Relentless Pursuit of Performance – Dean’s Latest A2 Wind Tunnel Trip
I promised a report of my most recent trip to the A2 wind tunnel back in 2021. While it took me a while to get to the write-up, I fortunately still have all the data and notes. Even better, now that time has passed, I can draw better conclusions about this trip than I could when I made the trip in 2021.
Baseline Aero Position
My baseline position that I wanted to test in the wind tunnel was based on a more relaxed position I returned to ride due to neck pain and general declining comfort and power in my prior pursuit position. I entered the A2 wind tunnel in this new position and decided to take a hybrid approach on how to get the most out of my tunnel time. While I had some specific things I wanted to test, I let the tunnel operators decide on much of what to change and test with the hope of finding something I might miss on my own.
What Yaw Angle to Test
I tested at 0 and 5 degrees of yaw, or apparent wind, while in the tunnel. Why 0 and 5 degrees? I’ll save the deep dive about what actual yaw a time trialist or track rider typically faces for another article. This being said, I can tell you that when riding outdoors the yaw is usually a lot closer to 0 than it is 5 degrees, but sometimes more than 5 degrees, and actually never quite 0 degrees. Clear as mud, right?
The first thing you notice when testing at 5 5-degree yaw in a wind tunnel is it feels similar to a crosswind in real life. If you watch a video of a cyclist riding directly toward you you’ll notice that, even in a straight line, they aren’t at 0 yaw. The bike rocks back and forth and the front and rear wheels also move side-to-side relative to each other. Wait, I said the deep dive was for another day… The bottom line is that I’m ranking things based on 0 degrees of yaw for the rest of this article!
Wind Tunnel Run 1 Equipment & Position
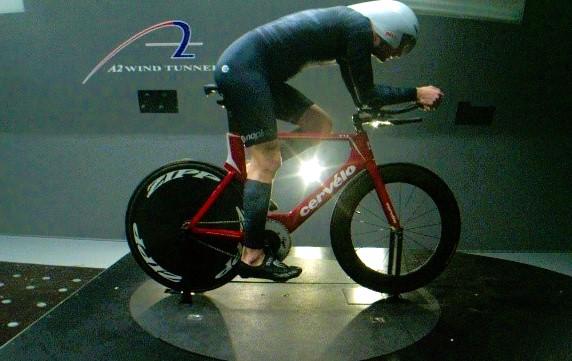
Run 1 is of my baseline pursuit position entering the tunnel. I was using a Bell Javelin helmet with visor, Nopinz skinsuit, calf sleeves, Cervelo T4 track bike with Zipp Vuka Stealth aerobar, and Zipp 808 Super9 carbon clincher wheelset with Continental Supersonic 23mm tires. I can ride similar power to my road bike in this position and had tweaked it to the point where I could spend hours in the position in relative comfort. My goal with this aero position is to maintain comfort and power while finding all the aero gains possible.
My baseline CdA was 0.232. At the time, this surprised me as it was a low number and this position is substantially more comfortable and taller than my last aero position. Also, I’m 6’3” and around 200 lbs… A2 supplies more photos than you can imagine, taking dozens with every run. My baseline position is shown below:
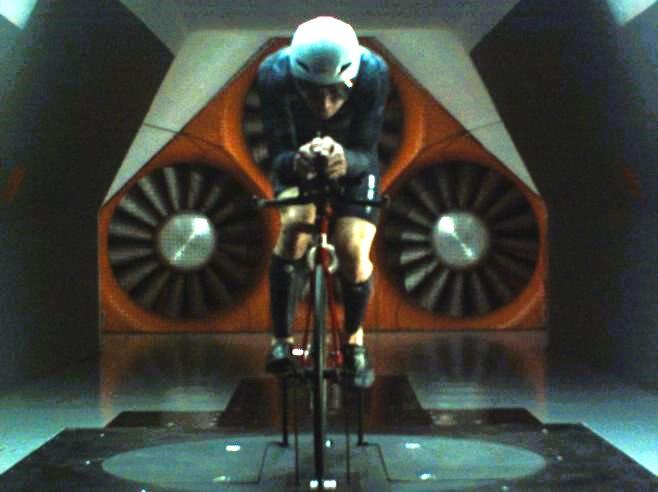 Wind Tunnel Testing. Head, Elbow and Hand Position.
The first things we tested in the wind tunnel didn’t require bike changes so they went quickly. We tested me tucking my head lower (CdA = 0.229), and then we added reaching my hands out as far as I could over the extensions (CdA = 0.228). We were rolling with gains out of the gate, which was encouraging.
Next, we moved my hands higher up by having me hold the tops of a couple of small 6” tubes over the extension ends. This was clever as it was quick to implement and could be removed if they didn’t help. It worked. My CdA lowered to 0.225 with my hands higher.
We tested the full range of elbow pad widths. My baseline position had a comfortable width of 21cm measured from pad center to pad center. Combined with the cumulative changes we’d already made, my CdA at this width was 0.225. We moved the pads 2cm wider (CdA 0.232) which clearly increased drag. We then went 2cm narrower than baseline which reduced CdA to 0.227. Based on what we were seeing, we went another 2cm narrower (now 17cm center to center) and CdA dropped to 0.220! It was still comfortable, so this change was a keeper.
We tested aerobar pad width at two even narrower settings of 15cm on-center (CdA = 0.217) and 13cm on-center (CdA 0.216). While I could ride in these positions in the tunnel, I’d need to see how it felt in the real world. Power and comfort at this width were certainly getting into an area of possible compromise.
With all of these measurements, I wanted to test what was comfortable and also a little beyond. This would allow future riding and adaptation to determine which of these gains I could run with and which had to be scaled back.
Helmets, Shoulders and Armpad Drop
We tested the Giro Aerohead helmet next. It wasn’t bad at 0.218, but it was slightly slower than the Javelin I was using. We also tested shrugging my shoulders more. At 0.219 CdA, it didn’t seem to help.
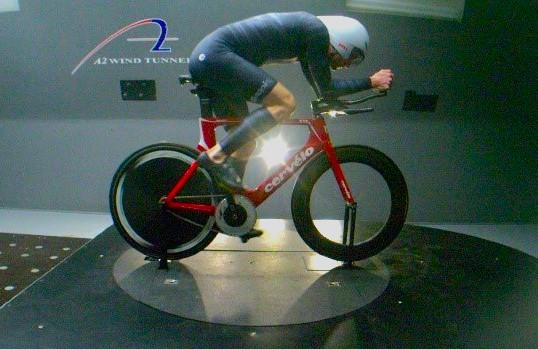
Next up we tested armpad drop. We did this with the narrowest pad position. Lowering 1cm resulted in the same 0.216 CdA as the baseline drop. We went another 1cm lower (2cm lower than baseline) and saw gains with CdA 0.212 which was the lowest of the day. I felt this overall position was worth trying as it would lead to a big speed breakthrough if I could maintain power here. When comparing this modified position to my initial position you can see it looks faster. Keep reading to find out whether it is.
 Next, we went another 1cm lower drop (3cm lower than baseline). With a CdA of 0.213, this position had more drag than the prior so we went back up 2cm on the drop for the final tests. We tested some variations where I sat on the saddle and also a Castelli skinsuit, but nothing else reduced CdA any more than what we had achieved already.
Interestingly, this last round of testing proved out what we have seen with many riders in fitting sessions – lower isn’t always more aero! This should be encouraging news for competitors of all levels as it means you don’t necessarily have to compromise breathing, comfort or power potential just to reduce drag.
The Final Tally – CdA Reduction
My overall CdA was reduced from 0.232 heading into the tunnel down to 0.212 post test.
What does this mean in the real world? The rule of thumb for aero gains is 0.01 CdA reduction results in 1 second per km of time saved when riding at 25 mph. This means if a top age group triathlete reduces CdA 0.02 units, like I did, they’d see a 2-second reduction per kilometer for a total of six minutes of time savings in an Ironman without pedaling any harder! This being said, this is just taking aerodynamics into account and real-world riding also involves biomechanics and other important variables.
The Results – Putting Things to the Test Riding Distance
The most important test for me was riding in this position for some workouts and seeing how things went with time and intensity. I’ll say right away things didn’t go well initially. In my first workout, I spent about 60 minutes in the aerobars riding at 90% FTP in the new position. This resulted in the same cervical neck pain that stopped my riding in the past. After a few weeks of recovery from the neck pain, I moved back to a more conservative position – specifically the position that tested at 0.220 CdA using the baseline drop before reducing pad width those last 4cm. This position felt great and is the one I stuck with going forward.
There’s an important lesson here about seeing what tests fastest but not letting the tunnel dictate the reality. In the end, riding in a position that is not just aero, but also comfortable and sustainable for the length and type of event you’re riding in is what has to dictate things. As an added benefit, if you’re comfortable in your position you’ll end up riding in it more. This usually means more effective training, better recovery, less injuries and more events. This is why a Fit Werx’s fitting using the concepts of Bike Fit 2.0 never takes just one variable into account. If you want to reach your potential, you need to, literally, watch out for tunnel vision when it comes to building your riding position.
Back to the Tunnel?
While this concludes my look back at my 2021 A2 wind tunnel visit, I’d love to test there again. I have many questions and areas I want to look into based on field testing I did for my 2021 Masters Track Nationals position and my 2023 time trial position. I have no plans to stop continuing to pursue sustainable speed on the bike.
Thank you for reading. If you have any comments or questions please post below. If you are interested in a Fit Werx fitting assessment contact us.