Bike Build Details
We’ve always tried to sweat the details; to build our bikes better and pay attention to details that help make a Fit Werx bike a little more special than average. However, we have found that these details can be misunderstood at times as they are not common or the way that most shops do them. For this reason, we thought it worthwhile to explain a few of these details in hopes of adding some clarity as to why we build bikes the way we do and help folks understand some of these details and the mechanics behind them better.
Soldered Cables:
No other mechanical detail that we do creates more questions from riders and other shops than this one. Instead of putting alloy crimps on cables to keep them from fraying, we use the age old European tradition of soldering our cables whenever possible on new bike builds. Why? Well, not only is it a bit of a lost art and looks better, it is also permanent and provides the nice benefit of often allowing a cable to be removed and reinstalled without removing or replacing a crimp. Sadly, it seems like most mechanics in shops out there are not familiar with soldered cable as we often see bikes we built come back into the shop with cable ends having been installed over the solder by another shop. When we ask why end caps were installed on top of the solder, we are usually told that the other mechanic had said we had “forgotten” or “had not completed the job” when we built their bike. We didn’t! Our recommendation: If you bring your Fit Werx bike to another shop, let them know the cables are soldered and to not install redundant crimps. This detail takes longer to do, but we think it is a nice touch and have done it since our first day in business and it is part of what makes a bike from Fit Werx special.
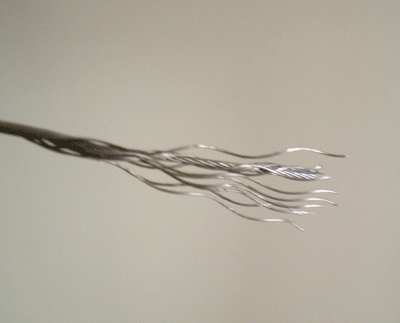
From left to right are examples of soldered (note the change in color/appearance at the cable end), end capped/crimped and a frayed cable (what happens when soldering or end caps are not used).
Caps and Lock Nuts on Presta Valves:
The Presta, or “French”, valve found  on performance oriented road bikes with narrow rims is a smaller diameter than the Schrader, or “American”, valve found on cars and many mountain and recreational bikes with wider rims. Both valve types are pictured and they are visually quite different.
One big difference between the two valve types is that a Presta valve uses an external valve core while a Schrader valve uses an internal valve core. While both types of cores work well, a Presta valve’s external core seals itself when the top of the valve is twisted clockwise and locked against the top of the valve. This means the Presta valve is completely sealed from the elements and from debris intrusion when the valve is closed and thus does not require any additional cap to be on top to seal it up like a Schrader valve. We remove the plastic valve caps on Presta valves as they just add weight and are another thing to unscrew when inflating the tire. Why do Presta tubes come with valve caps if they are not needed? The plastic cap (not shown) that comes with the tube keeps the pointy metal valve top from puncturing the rubber tube when it is folded on itself in the packaging from the factory. Otherwise, they are totally extraneous on Presta valve tubes…
Schrader valves have the valve core mounted totally inside the tube stem and thus run the risk of dirt getting stuck inside and releasing air if there is not a plastic cap on top to keep things out. So, leave the plastic Schrader valve cap on a Schrader valve.
You can also see that the Presta valve pictured has threads and nut on it. The nut is designed so that it can be locked up against the rim to prevent the tube from sliding inside tire. While this may be helpful on a low pressure mountain bike tire, it is not needed on a high pressure road tire where the air pressure locks the tube in the tire and keeps it from rotating in the tire. Some road Presta valve stems do not even have threads on them and thus do not include the nut at all. If you are inflating your tires regularly (you should before every ride) you will never need the nut, so we get rid of the extra weight and potential rattle creator in most cases.
Cassette “Pie” Plate:
 Many pre assembled bikes come from the factory with a plastic disk that is designed to keep the chain from getting sucked into the spokes in the event of an over shift. If your rear derailleur is adjusted and aligned properly, it should never over shift into the spokes and these plastic “pie” plates thus are not needed. The “pie” plates also tend to yellow and crack over time, add weight, start to make a lot of noise and simply do not look very good. For all these reason, if a bike comes with a “pie” plate we will usually remove it. Note that it would be recommended to leave the plate on a child’s bike as kids often bend their derailleurs and this throws off the adjustment and can allow the chain to over shift.
We hope that this overview of some of the more common mechanical things we do a little different from many places helps. If you ever have a question on a mechanical element of your bike or why we did (or did not) so something on your bike, please let us know. We’re happy to answer any question and we usually have a reason for doing it the way that we did:-) Ride well and often!


